6 tips for improving the kitchen workflow with Smartwhip
Every professional bar and kitchen worth its money will have a selection of modern gadgets to improve the kitchen workflow and perfect those trademark dishes. A whipping siphon, for instance, significantly speeds up the infusion process of oils and alcohols and can be used to optimise the flavour, texture and aesthetic of foods and drinks. Smartwhip serves precisely this purpose: to revolutionise the world of gastronomy by improving the efficiency and capabilities of professional chefs, caterers and baristas.
Because Smartwhip is significantly larger in size and content compared to other cream chargers on the market, its operation is slightly different. Conceived especially for large-scale productions, Smartwhip also features a distinct mechanism different to that of conventional cream chargers. As such, we present you with six tips and tricks that will optimise your kitchen workflow with Smartwhip and allow you to master your craft with boldness and style.

Optimise your kitchen workflow with Smartwhip
- Preparation is key: A smooth kitchen workflow takes good preparation. Begin by laying all the necessary components out, including:
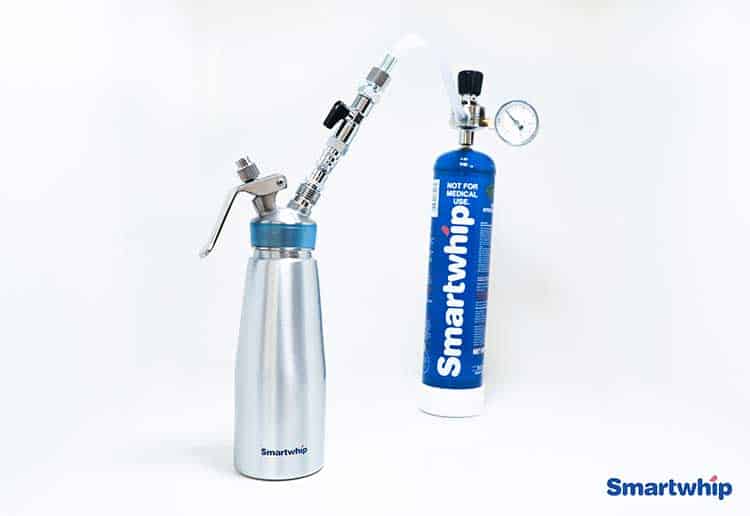
- The Smartwhip cylinder – with the pressure regulator tightly screwed on, and the flow switch closed.
- A cream dispenser – with the customised adapter fastened and ready for action.
- A spatula and bowl – to vent and release the contents of the cream dispenser into.
- Measure with accuracy: Measure the required ingredients for your creation precisely and mix them together before filling them into the cream dispenser. Mixing the ingredients beforehand lowers the chances of clogging up the cream dispenser with lumpy bits, resulting in a seamless kitchen workflow.
- Hint: Take note that the recipe for a 500 milliliter and a 1-litre cream dispenser may vary!
- Tip: Experiment with different ratios to create the perfect recipe as the balance of solids and liquids can make or break a dish. Find a full range of recipes on Smartwhip or create your very own adaptation!
- Preparation is key: A smooth kitchen workflow takes good preparation. Begin by laying all the necessary components out, including:

- Time to amp up the pressure: Getting the pressure right is essential for achieving the desired texture. Twist the pressure knob clockwise to set your Smartwhip to the desired working pressure.
- Tip: Visit the Smartwhip pressure table to get the right pressure for the amount of liquid you are working with.
- Ready, set, charge: Connect the Smartwhip system to the cream dispenser and press the flow switch down to release the gas. Make sure to keep the cylinder and cream dispenser upright while charging!
- Hint: You should hear a ‘click’ sound when the system connects. Do not open the flow switch before the system is properly connected!
- Hint: When the flow switch is open, you will hear a slight hissing sound – this is the sound of the gas flowing into the cream dispenser.
- Time to amp up the pressure: Getting the pressure right is essential for achieving the desired texture. Twist the pressure knob clockwise to set your Smartwhip to the desired working pressure.

- Shake it up: When the hissing sound subsides, close the flow switch and detach the Smartwhip system from the cream dispenser. Now, it’s time to shake.
- Hint: Shake the cream dispenser according to the thickness in consistency you wish to achieve. The secret? The more you shake, the firmer the mixture will become.
- Tip: Shaking the cream dispenser too vigorously will stiffen the mixture and potentially clog the cream dispenser. We recommend giving it a good 4-6 shakes and then testing the consistency (read our blog post on how to perfect whipped cream). If the consistency is too runny, simply shake it a few more times!
- Final touch: With mixtures that are not released through the dispenser nozzle (such as oils and alcohols), it is important to vent the cream dispenser before unscrewing the lid, as the chamber is under high pressure.
- Tip: Hold a slanted, upside-down bowl above the nozzle of the cream dispenser while venting to avoid wasting part of the mixture that might spray out. To vent, press the lever until the gas has flowed out entirely, then unscrew the lid.

Discover our assortment of recipes on Smartwhip and allow yourself to be inspired anew. Don’t have a Smartwhip system yet? Optimise your kitchen workflow and get yours here!
